|
| 

What Are Spider Mites?

Spider mites are actually very teeny tiny arachnids, so small that they are hardly visible by the naked eye. They live in colonies, typically on the underside of plant leaves or in little nooks and crannies especially near the joints between leaf and stem. They are also prolific breeders, efficient at quickly building their numbers in little time. Quite often, spider mite infestations go on undetected until evidence of severe damage to a plant becomes notable. They are most commonly found in warm, dry environments and can wreak havoc on both outdoor gardens and indoor houseplants alike. Spider mites are known to feed on several hundred different species of plants, to include many found here in Alberta.
There are several hundred different species of spider mites, but most have eight legs and oval bodies that are green, yellow, brown, red or pale in colour. The red spider mite is the most common specie found in outdoor gardens and the two-spotted spider mite (pictured) is most common specie found on indoor houseplants.
In warm, dry, and dusty conditions, a female two-spotted spider mite can hatch in as little as 3 days and start laying eggs in as little as 5. She can easily lay up to 20 eggs a day and live for 2 to 4 weeks… each of her female eggs hatching and laying their own with in days, that’s an exploding population of spider mites.
Due to their expedient life cycle and exploding numbers, once a spider mite infestation has been discovered, there is no time to waste in getting it under control. Spider mites, although tiny, can quickly overcome a plant causing irreparable damage. Each spider mite feeds by piercing the plant cell membranes and sucking out the plant’s fluids, dehydrating the cells of their nutrients, effectively killing the plant cell by cell.
How to Spot Spider Mites
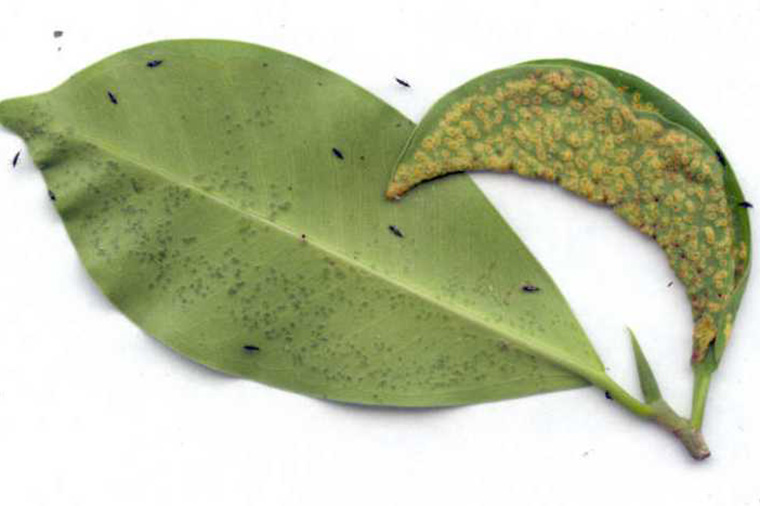
Look for Leaf Damage
While the visible damage done by spider mites can vary slightly from plant to plant, there are a few general markers to look for.
1. Patterns of light coloured dots or stippling on the leaves of your plant.
2. Sometimes, but not always, tiny holes where the spider mites have chewed straight through.
3. More advanced damage may cause leaves to turn yellow or red, die suddenly and prematurely drop off your plant.
Look for Moving Spots
This may be one of those few times you have an actual excuse to break out grandpa’s old magnifying glass. At the first signs of leaf damage, start looking for tiny moving spots. Pay closest attention to the underside of leaves. These tiny spots can easily be mistaken for dust or flaws in the leaf, but a good magnifying glass will help provide some certainty. If a magnifying glass is not available, try removing a leaf with a suspicious spot or two, lay it on a steady surface upside down, and watch for movement.
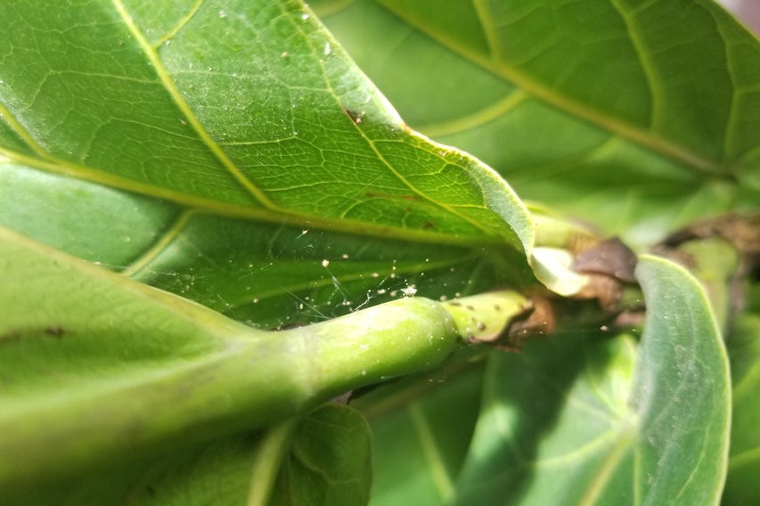
Look for Webbing
Perhaps the most infamous telltale sign of spider mites, is the delicate webbing found hidden beneath leaves and in the joints between leaf and stem. This webbing is so fine and delicate it is easily and often overlooked, even by a more seasoned plant parent. It is usually not until many spider mites have populated a plant that the webbing becomes more obvious and distinctive, and therefore this should not be considered an early indicator of spider mites but rather a later indicator of an infestation.
How to Manage Spider Mites
Isolate and Prune Your Plant
Once spider mites have been confirmed, the first thing to do is isolate your infested plant from others to prevent spread. Once your plant has been isolated, identify the affected areas. You can prune away the affected areas with the heaviest infestation. When pruning, it is important to be mindful to not prune too much of the plant. It is best not to prune more than 1/3 of the total plant, otherwise you may send the plant into shock. You will also want to make sure any infested clippings are disposed of properly. Be sure they are bagged and sealed immediately after pruning. Consider wearing disposable gloves or wash your hands immediately after dealing with an infested plant.
Wash Your Plant
Once the heaviest infested areas have been removed, it is important to also treat the remaining plant. Washing your plant with a handheld shower nozzle using room temperature water, can help to dislodge and remove any remaining spider mites and eggs. Pay close attention to the underside of leaves especially and the small nooks and crannies they enjoy.
Treat with Natural Miticides
It is unlikely a pruning and a thorough wash will get every spider mite or egg, following up with a Miticide is usually necessary. If you want to avoid harsh chemicals on your plants or in your home, there are a few more natural options. Furthermore, if you find you have frequent infestations, switching up the type of miticide you use can help prevent the spider mites from building up immunity.
Neem oil is both an effective treatment and preventative measure for several types of common houseplant pests. It’s effectiveness is cumulative, so it will need to be regularly re-applied before it reaches its full potential.
Cinnamite is a pesticide derived from cinnamon oil and is non-hazardous. It won’t kill eggs, but will be effective for killing adult spider mites. For maximum effectiveness, spray your plant every 3 days over a couple of weeks to make sure you get all of the newly hatched spider mites before they start laying their own eggs.
Rosemary Oil can be diluted in water for another effective treatment option. Rosemary oil is non-toxic to humans, so a great choice especially for herbs and plants that are intended to be ingested.
Use Natural Predators
Alternatively, for a one-time application treatment, you can employ the natural predators of spider mites, such as predatory mites, ladybugs, and lacewings to hunt out and take care of any remaining spider mites.
TIP : If you decide to use predatory mites, avoid miticides and pesticides, as they would also be harmful to the good bugs you want there.
How to Prevent Spider Mites
Increase the Humidity
Spider mites like it dry, so increasing the humidity around your plants is the first line of effective prevention. A room humidifier would be ideal, however periodically spraying your plants with a fine mist or leaving a dish of water to evaporate nearby can also be beneficial. You can also try adding moisture retaining peat moss to your soil and make sure your plant isn’t in direct sunlight where it is more likely to dry out faster.
Clean the Leaves
Spider mites also like it dusty, so a dustless leaf would not be their first choice in finding a new home. Consider adding leaf wiping to your plant care routine. Depending on the dust levels in your home this could be as often as every few weeks to a few times a year. If you have a large number of plants or are just looking to simply things, another option is to give your plants a shower from time to time, where their leaves can be gently sprayed clean with tepid water, but be sure to get their undersides and not over water their pots in doing so.
Use a Preventative
Once your leaves are clean, a last line of defense is to use a natural oil to help create a protective barrier on the leaves. Neem oil is derived from the nuts of the Neem evergreen tree and acts as a repellent against new pests. For maximum efficiency, neem oil should be re-applied regularly.