|
| 

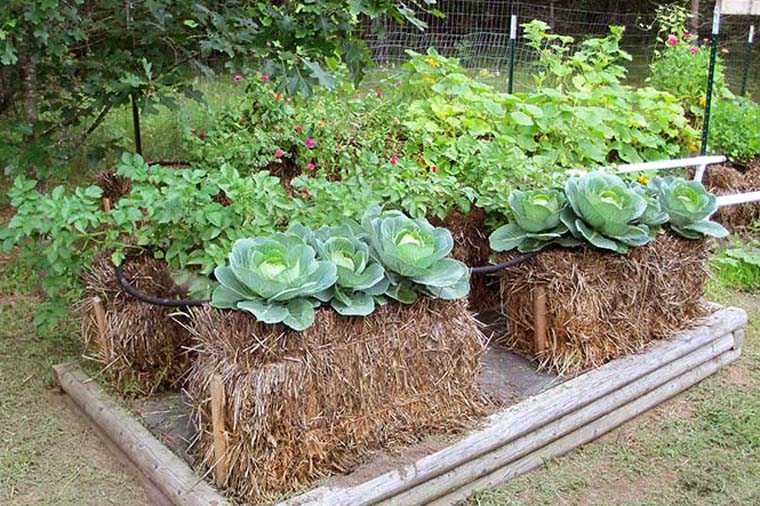
Why Build a Straw Bale Garden
It may be a bit untraditional, but there are some big benefits to growing vegetables in straw bales. Straw bale gardens are easy to start wherever you have full sun exposure, no digging required. They are temporary and easy to move, or even remove completely if needed; a great option for rental properties. In addition to being easy to set up, straw bales are also an ideal growth medium. The loose uncompacted structure of straw creates a well-draining and easy to weed environment for vegetables to grow. Straw is also nutritious. Straw does break down with time and as it does, important nutrients are released and made available to feed the veggie plants. The key is to prep your straw bales to kick start the breakdown process before your plant for veggies.
Preparing Your Straw Bales
Week 1
Step 1 : Water Your Bales Thoroughly
Before planting, make sure to water the bales heavily once a day for 4-6 days. This causes the bales to start decomposing, creating a rich medium that is perfect for vegetables!
Step 2 : Fertilize
Sprinkle the bale with a fertilizer that has a high first number (eg. 21-0-0) every second day for 4-6 days. These fertilizers are high in nitrogen which help to speed up the decomposition!
Week 2
Step 3 : Keep Watering & Fertilizing
Add half the recommended amount of the same fertilizer once a day for 3-4 days and water the bale afterwards.
Step 4 : Prepare
Finally, after about 10 days stop adding the nitrogen fertilizer. At this time, you can start using a balanced all-purpose fertilizer (eg. 20-20-20) to begin preparing for your vegetables. Don’t forget to keep watering!
Step 5 : Let Rest
Leave the bale for 1-2 days to allow it to cool down before planting. As the bale is breaking down, the internal temperature will heat up to about 50C. After this short rest period, your bales are ready for planting!
Planting Your Straw Bales
Week 3
Step 6 : Make a Hole
Remove some of the straw to make a shallow bed inside the bale where your seedlings or seeds will go.

Step 7 : Plant
If you are planting seedlings, place them directly onto the straw and fill in around them with the soil. For seeds, fill the space with soil first and then plant the seeds as you would normally. Ensure your seeds or seedlings are spaced far enough apart to give them enough space to grow!
Step 8 : Fill
Add a high-quality potting soil to fill in the hole. Avoid using topsoil that coarse and is designed to retain moisture.
Step 9 : Water
Once planted, water gently and add more soil as needed to stabilize the seedlings as they become established.
Tips for Success
Placement : Ensure bales are placed in a bright, sunny location and with easy access to water.
Temperature : In order to plant, the bale should be warm to the touch but not hot. If they are too hot, wait another day or so and check again.
Water : Do not allow your bales to dry out! Watering daily is ideal. A soaker hose set up on a timer can help with this.
Fertilize : Add a balanced, water soluble fertilizer to your bales once a week.