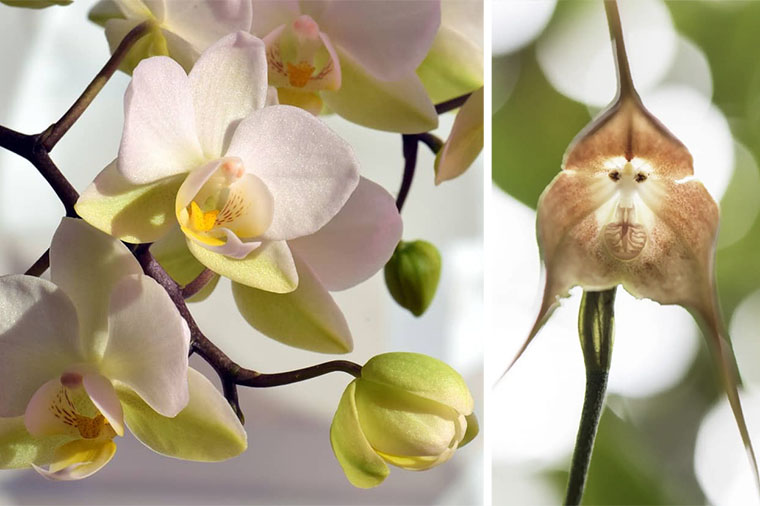
All About Ochids
Hold on to your flower pots, this month’s ultimate care guide is about Orchids and they are an impressive and interesting species! Orchids belong to the Orchidaceae family, a diverse and widespread group of flowering plants, with an impressive 28,000 accepted species. That means there are more than twice the species of orchids than there are species of birds and about four times the number of mammal species. That’s a lot of orchid varieties!
Orchids are known for their colourful, fragrant, and sometimes very usual blooms. All orchids are perennial herbs that lack any permanent woody structure. However, they can have two distinct growing patterns:
Monopodial: The stem grows from a single bud, leaves are added from the apex each, and the stem grows longer accordingly. The stem of monopodial orchids can reach several metres in length.
Sympodial: The plant produces a series of adjacent shoots, which grow to a certain size, bloom, and then stop growing and are replaced by new growth. Sympodial orchids grow horizontally, rather than vertically. Sympodial orchids usually have pseudobulbs joined by a rhizome, which creeps along the top or just beneath the soil.
Due to the sheer number of species, we can’t possibly come close to covering all of them, so here are a few of the most common species found in stores and a few of the most unusual species just for fun! It’s also worth noting that different species have different care requirements and many will differ slightly from our recommendations below. Our care guide is meant to provide a starting point; be sure to seek out the specific care recommendations for your specific variety!
Most Common Orchids
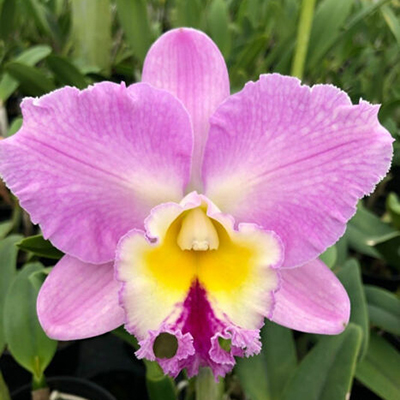
Cattleya Orchid
Cattleya
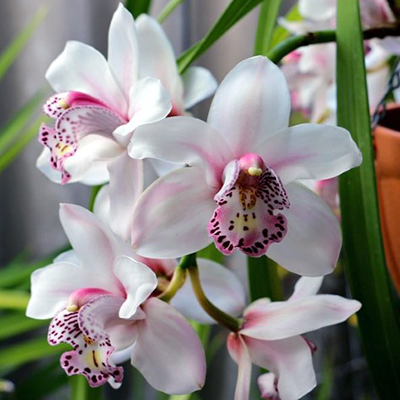
Boat Orchid
Cymbidium
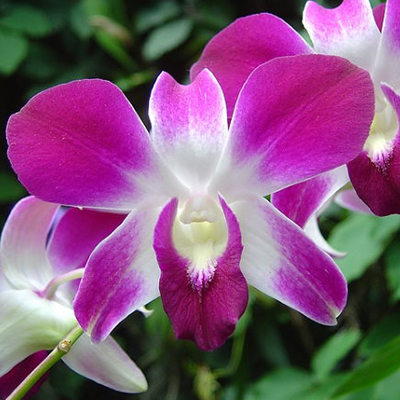
Dendrobium Orchid
Dendrobium
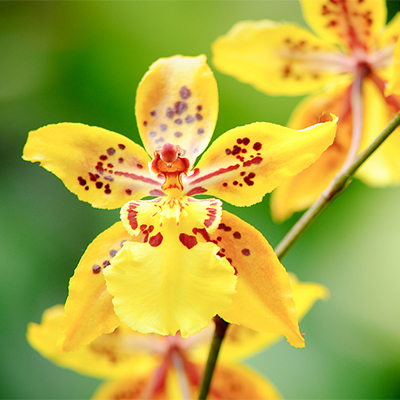
Dancing Lady Orchid
Onicidium
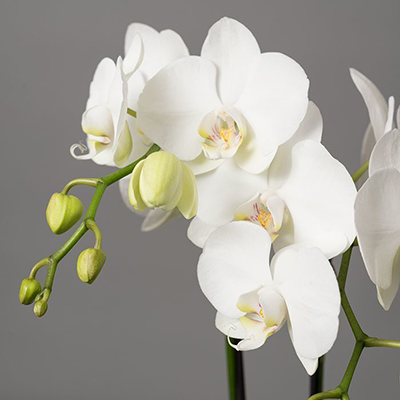
Moth Orchid
Phalaenopsis
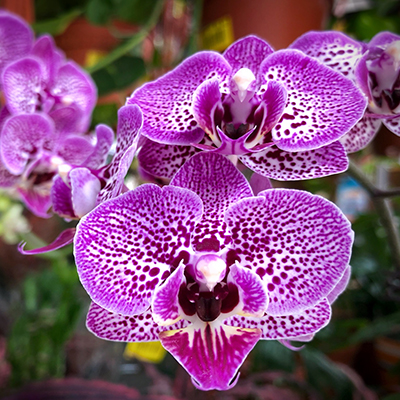
Vanda Orchid
Vanda
Most Unusual Orchids
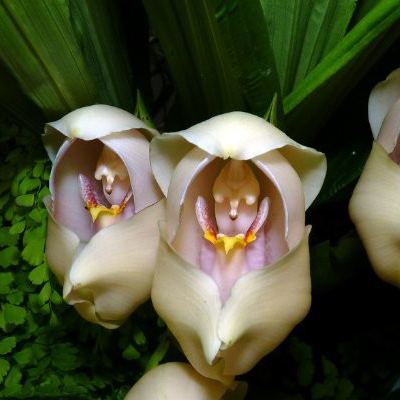
Swaddled Baby Orchid
anguloa uniflora
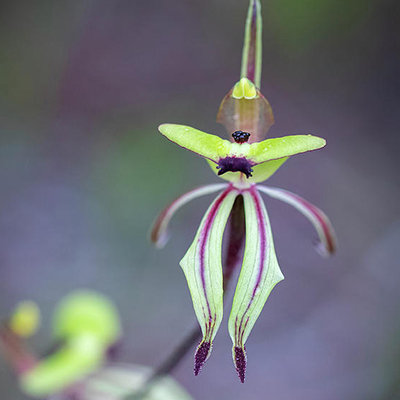
Clown Orchid
Caladenia roei
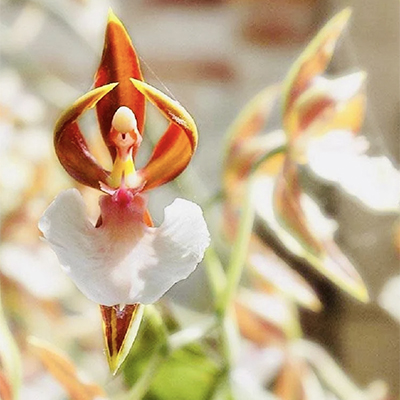
Ballerina Orchid
Caladenia melanema
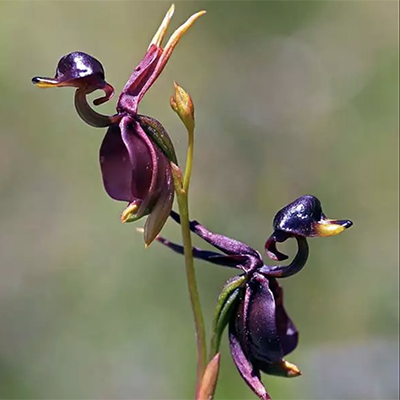
Flying Duck Orchid
Caleana major
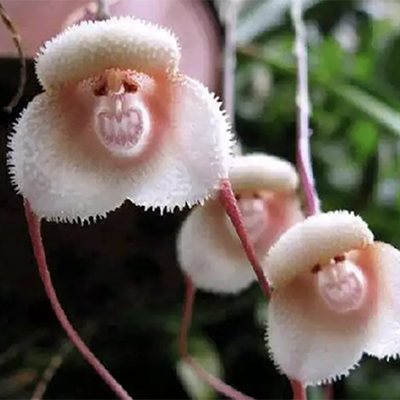
Monkey Face Orchid
Dracula sima
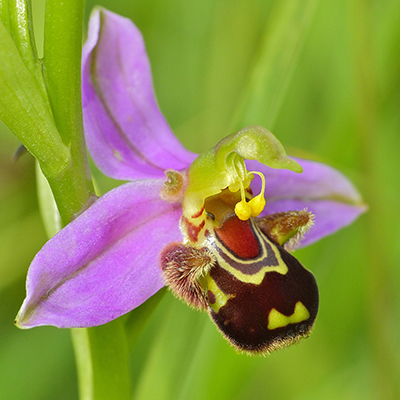
Bee Orchid
Ophrys apifera
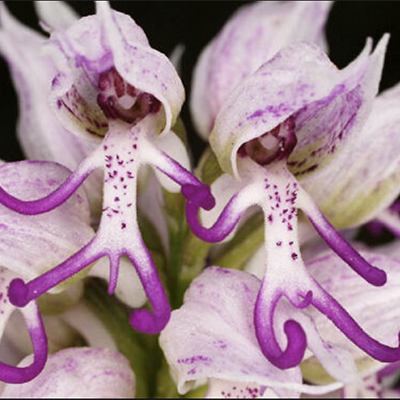
Monkey Orchid
Orchis simia
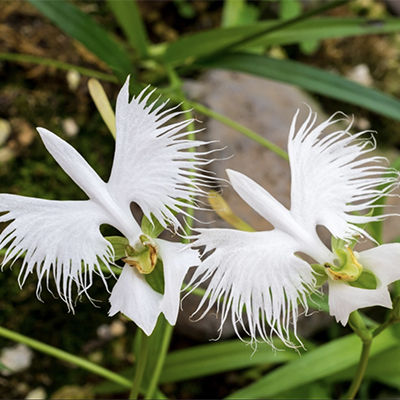
White Egret Orchid
Pecteilis radiata (Habenaria radiata)
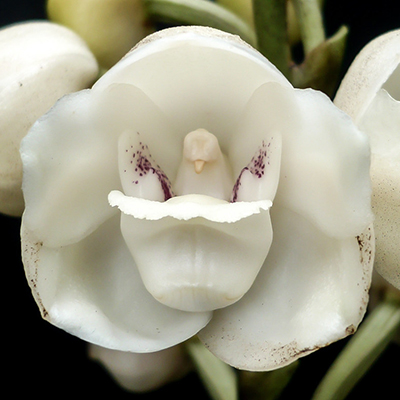
Dove Orchid
Peristeria elata
Plant Care
Light
In general most orchids like really bright environments with long hours of indirect sunlight. Direct sunlight can be too harsh and scorch the tender plants. The best placement for most orchids will be near a South facing window, but out of the direct rays of the sun.
Soil
Orchids need a fast draining medium that will retain adequate moisture. The best soil mix will depend on your variety and whether it’s a young plant or a plant with a more mature root system. A basic mix for growing orchids consists of coarse perlite, bark, and sphagnum moss. You can also add charcoal, cork, sand, and even rocks to your mix, but this is optional.
Water
Orchids need ample water but should be allowed to dry out some between waterings. One way to check for watering is by poking your finger about an inch (2.5 cm.) into the growing media. If it’s dry, give it some water; otherwise, let it be. Be sure to adjust your watering schedule according to their growth cycle and water more during periods of growth and less during periods of dormancy.
Humidity
Orchids are tropical plants that thrive in humid conditions, they prefer 50-70% humidity especially during their growth cycle. Use a humidifier or place a saucer with water to bring the humidity levels up. Misting with room-temperature water also helps but avoid spraying the flowers.
Temperature
Temperature is also important for indoor orchid care. While orchids tolerate cooler or warmer temperatures throughout their normal growing season, they prefer temperatures between 60 and 80 degrees Fahrenheit. They also need to experience a temperature difference of 15 degrees Fahrenheit cooler at night than during the day in order to bloom sufficiently. Keep them away from cold drafts, especially in winter months.
Fertilizing
Fertilize orchids weekly or bi-weekly while they are producing new growth and decrease to monthly or bi-monthly intervals once they mature. Fertilizing regularly during the warmer months will help prepare it for its bloom cycle, which typically occurs in the colder months. Discontinue altogether once the plants go dormant.
Repotting
Orchids typically need repotting done every 1-2 years. If your orchids suddenly stop blooming but have suitable light, temperature, and humidity, then repotting may be necessary.
Pot Size
One very, very important tip for repotting Orchids is to only go up one pot size. For example, if your Orchid is growing in a 4-inch pot, don’t go any bigger than a 6-inch pot for its next new home. When you place your plant into a pot that is far too large, what happens is that it will take too long for the soil to dry out and the roots become waterlogged.
Flowering
The bloom is the most dramatic part of an orchid’s life cycle. Blooms occur once or twice a year, typically in the winter, and can last up to several months.
Dormancy
Once the bloom cycle has ended, the blooms will wilt and fall off. The spike may turn brown and the once glossy leaves will lose their luster, older leaves may even turn yellow. At this point, the orchid may not look healthy, but this is typical for its dormancy cycle. The dormancy cycle allows the orchid to strengthen its root system and ready itself for another growth cycle in the coming months.
Toxicity
Most species of orchids are not considered to be toxic or poisonous to humans, cats, or dogs. However, if ingested they may lead to stomach issues.
For More Information
The American Orchid Society is a great resource for further information on Orchid Care!
Plant Problems
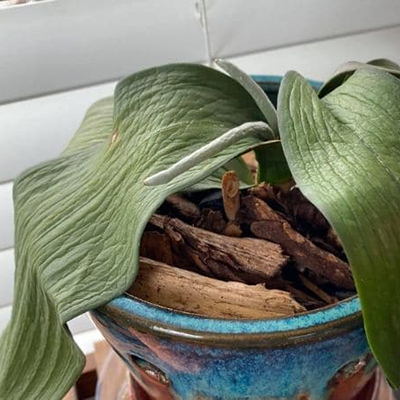
Drooping Leaves
When orchids take on a droopy, wrinkly appearance this is usually a sure sign of a watering problem and likely means there is also a root problem. If the pot has been kept overly wet and soggy and as a result, the plant has experienced root loss, it will no longer be able to uptake water. Alternatively, if it has been left extremely dry and has had no water to uptake for an extended period of time the leaves may also begin to droop and wrinkle.
First, remove the potting media and determine the problem: brown and mushy roots = too much water, grey and shriveled roots = not enough. If the plant has been underwatered, soak the root system for 5-10 minutes in clean, warm water. If the plant has been overwatered, use sterilized sheers to cut away all dead or soft roots, then wash the root system under tepid water, before replanting in a fresh soil medium.
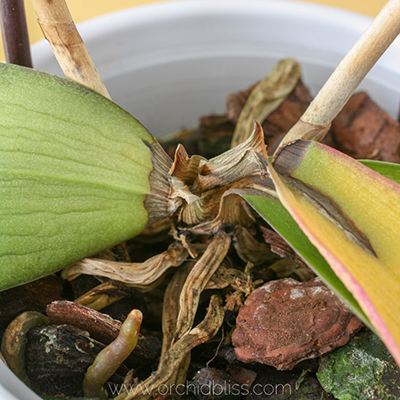
Crown Rot & Collar Rot
Crown Rot occurs when water is left in the top or the “crown” of a plant under cool conditions. The rot will eat away at the tissues connecting the leaves to the rhizome and can very quickly work its way down resulting in a total loss of all foliage if left unchecked. To avoid crown rot, water in the early morning and try to avoid leaving pools of water in the crown, this will give the plant time to dry out of the day before the temperature drops and the sun disappears for the night.
Collar Rot is very similar. Collar rot occurs when there is a wet condition that is allowed to persist in the crevices on the foliage. This usually happens when a plant is misted but the water collects in the crevices and does not completely dry before it gets dark. Being mindful of the amount of water that is misted and where it is collecting, as well as good airflow can help prevent this.
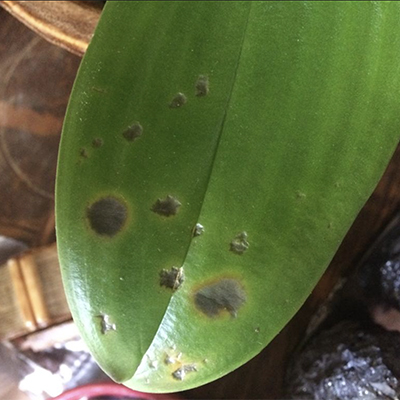
Spots on the Plant
Most of the time spots on the foliage are no concrn. These can be caused by physical damage to the plant from handling. However, if the spots become larger or are soft and watery, then it can be indicative of a bacterial or fungal problem and should be treated as such. First, quarantine the plant to prevent the spread to other plants. Then, using sterilized sheers remove or cut away any effected tissue, being careful to cut around and not through the affected areas. Treat the plant with a bacterial/fungicide made for use on ON plants or sprinkle cinnamon over the area. Always avoid letting water stand on plants and water early in the day to help prevent further infection.
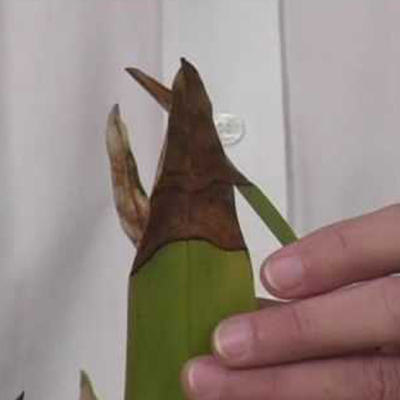
Leaf Tip Dieback
Leaf tip dieback can happen for several reasons but is usually caused by a case of severe over-fertilization or using extremely bad quality water. Another cause can be otherwise docile water and fertilizer impurities building up over time in the potting media. If it’s been many years since you’ve repotted this would probably be the case. This can be avoided by proper leaching of the potting media each time you water making sure to flush the pot thoroughly. At the next opportunity re-pot the orchid with fresh media and a clean pot.
Another cause can be severe underwatering of your plants. In this situation, the leaf tips die from the lack of water reaching this area of the leaf. Water and leach your pots thoroughly when needed to avoid this problem.
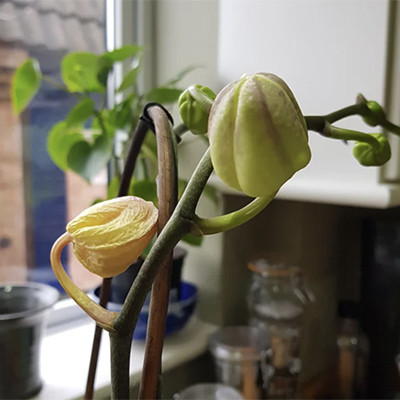
Bud Blast
Sometimes buds will yellow and shrivel before they’ve had a chance to open. This is referred to as bud blast. Some of the more common causes of bud blast include a sudden change to the environment, overwatering, exposure to very hot/dry air (especially near a heating vent or fireplace), exposure to cold drafts, air pollution, and ethylene gas from fruits and vegetables. The best prevention is to avoid any possible stress on the plant.
Also worth noting, sometimes a bud will not open if it is not receiving sufficient light. Be sure your plant is receiving adequate light, especially during its bloom cycle.
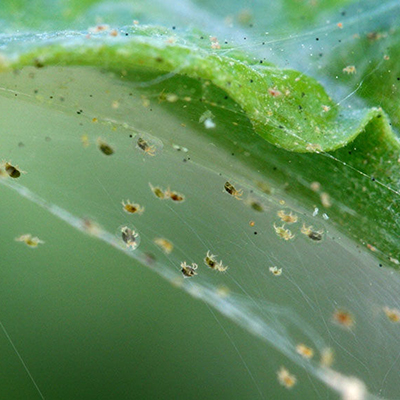
Pests
Unfortunately, orchids can be susceptible to a handful of common houseplant pests, including mealy bugs, spider mites, scale, aphids, and even thrips. If you suspect any of these pests, isolate your plant and begin a treatment routine appropriate to the type of pest.
 |
| 
